Digispark是一个这样的很小的开发板
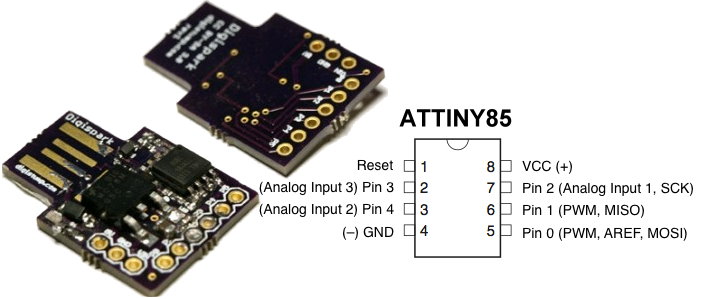
淘宝上10元左右一个
准备
配置Arduino IDE
打开 文件->首选项
把这个网址添加到附加开发板管理网址
https://raw.githubusercontent.com/digistump/arduino-boards-index/master/package_digistump_index.json
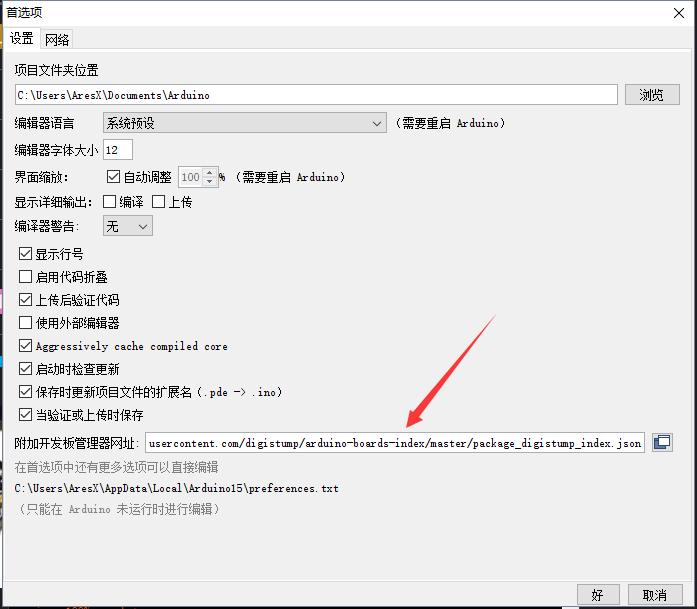
点击确定(好)
然后打开开发板管理器
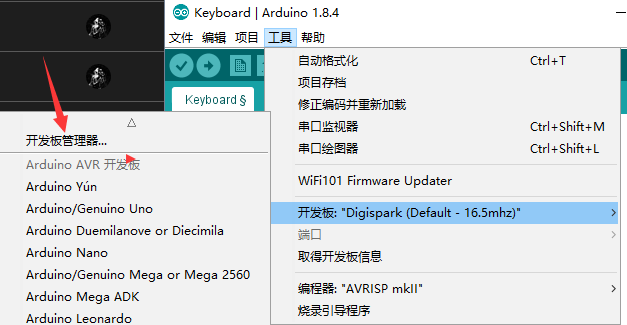
这时会自动更新一些东西,建议挂上代理,不然很慢
在Arduino中添加Digispark的支持
等待开发板管理器加载完成,搜索digistump并安装第一个Digistump AVR Boards
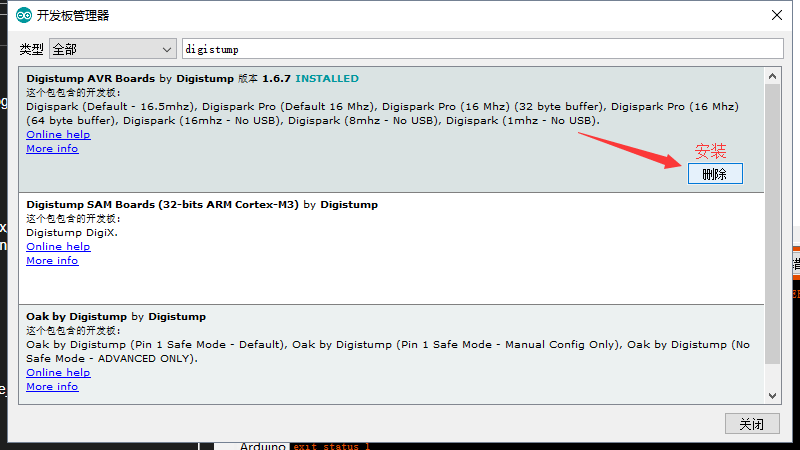
等待安装完成,完成后会有绿色表示
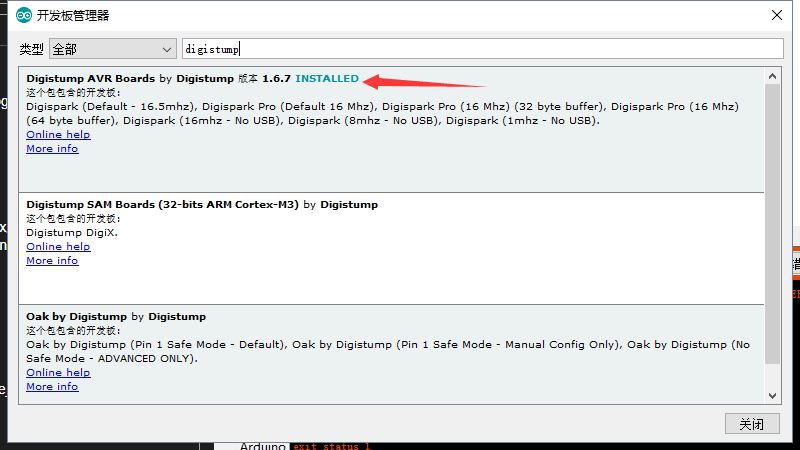
安装Windows下的驱动
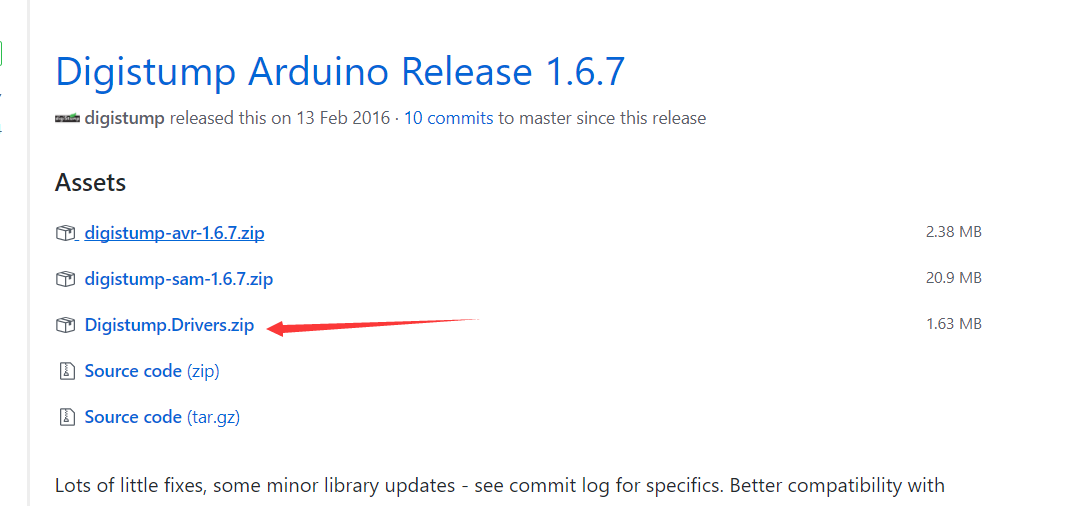
打开上面的链接,下载Digistump.Drivers
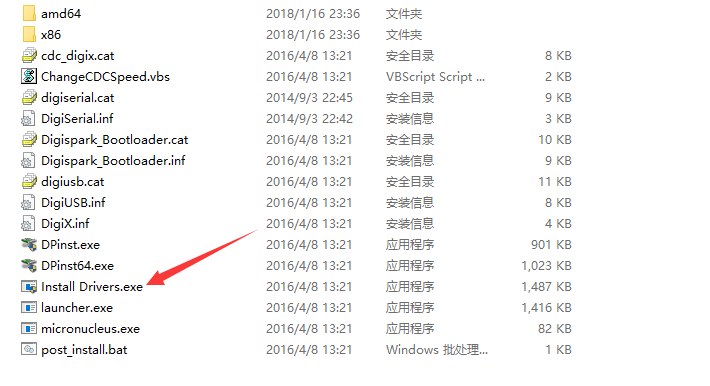
解压后执行Install Drivers.exe即可
代码
拿一个最简单的键盘功能来演示
badusb现成代码最多的就是给大黄鸭准备的代码
在这里可以看到一些示例代码
比如第一个Hello World的样例代码,把hello world改成Happy Hacking
1
2
3
4
5
6
7
8
9
| DELAY 3000
GUI r
DELAY 500
STRING notepad
DELAY 500
ENTER
DELAY 750
STRING Happy Hacking !!!
ENTER
|
然后用这里的在线工具
把大黄鸭代码转换成Digispark的代码(注意Board要选Digispark)
1
2
3
4
5
6
7
8
9
10
11
12
13
14
15
16
17
18
19
20
21
22
23
24
25
26
27
28
29
30
31
32
33
34
35
36
37
38
39
40
41
42
43
44
45
46
47
48
49
50
51
52
53
54
55
56
57
58
59
60
61
62
63
64
65
66
67
|
#include <avr/pgmspace.h>
#include "DigiKeyboard.h"
const char line1[] PROGMEM = "notepad";
const char line2[] PROGMEM = "Happy Hacking!!!";
char buffer[256];
#define GetPsz(x) (strncpy_P(buffer, (char*)x, 256))
#define KEY_UP_ARROW 0x52
#define KEY_DOWN_ARROW 0x51
#define KEY_LEFT_ARROW 0x50
#define KEY_RIGHT_ARROW 0x4F
#define KEY_LEFT_GUI 0xE3
#define KEY_ESC 0x29
#define KEY_TAB 0x2B
void digiBegin() {
DigiKeyboard.sendKeyStroke(0,0);
DigiKeyboard.delay(50);
}
void digiEnd() {
const int led=1;
pinMode(led, OUTPUT);
while (1) {
digitalWrite(led, !digitalRead(led));
DigiKeyboard.delay(1000);
}
}
void printText(char *txt) {
DigiKeyboard.print(txt);
DigiKeyboard.update();
}
void setup() {
digiBegin();
DigiKeyboard.delay(3000);
DigiKeyboard.sendKeyStroke(KEY_R,MOD_GUI_LEFT);
DigiKeyboard.delay(500);
printText(GetPsz(line1));
DigiKeyboard.delay(500);
DigiKeyboard.sendKeyStroke(KEY_ENTER);
DigiKeyboard.delay(750);
printText(GetPsz(line2));
DigiKeyboard.sendKeyStroke(KEY_ENTER);
digiEnd();
}
void loop() {}
|
上传
Ardunio IDE中选择工具->开发板->Digispark (Default - 16.5mhz)
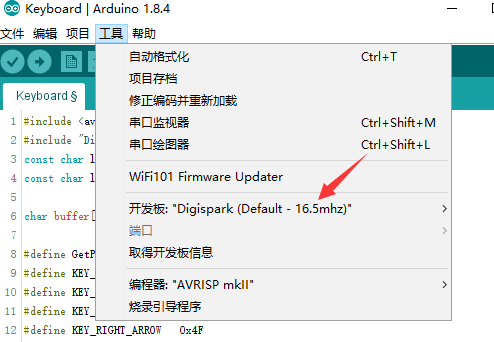
然后点击项目->上传等待编译完成

然后插入Digispark 开始上传
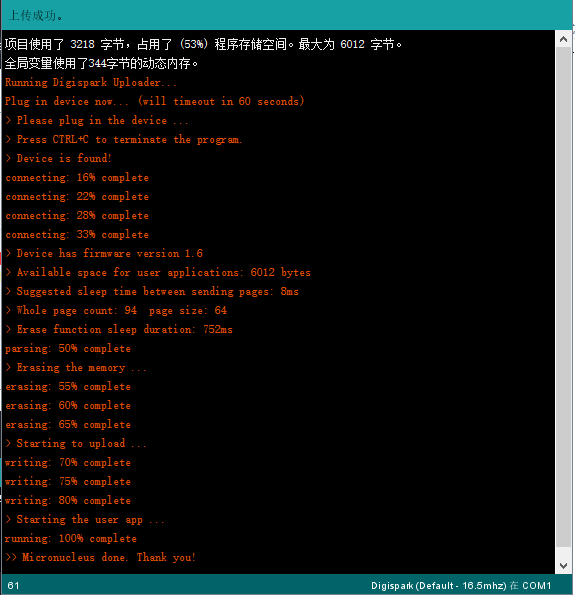
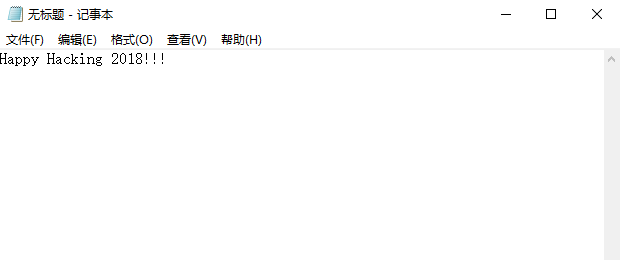
一旦上传完成,你会看到电脑自动的打开了运行然后打开了notepad,自动写了一句话
来自:ParrotSec中文社区


